• Announcements

    • Robin

      Welcome!   03/05/2016

      Welcome, everyone, to the new 910CMX Community Forums. I'm still working on getting them running, so things may change.  If you're a 910 Comic creator and need your forum recreated, let me know and I'll get on it right away.  I'll do my best to make this new place as fun as the last one!

Recommended Posts

Previous Thread: https://community.910cmx.com/index.php?/topic/5590-video-game-discussion-5/&page=1

It's been...almost two years since the last thread died, so...yeah.


So, since the last thread post, I got a Nintendo Switch and a few games for it: "Super Smash Bros. Ultimate", "Tears of the Kingdom", the "Mega Man Battle Network Collection Volume 1" and "...Volume 2", "Little Kitty, Big City", "Echoes of Wisdom", and "Splatoon 3" and its DLC. My brother also got "Pokemon Violet" and its DLC, so that's a bundle of fun as well.


Smash Ultimate, I've unlocked all the fighters and spirits, beat story mode, and occasionally come back to it to make a new stage or play against my brother.

Tears of the Kingdom is fun. Being able to build all sorts of fun contraptions to zip around the map, like a car or a hoverbike, is just...it's so fun. If I had any criticisms, it's minor things with writing, and that's it.

Echoes of Wisdom was another fun Zelda game. Playing as Princess Zelda for a change and being able to copy several overworld objects and enemies to basically treat the overworld as a puzzle unto itself. Meanwhile it has the most insane lore drops.

Mega Man Battle Network 2 was the first Mega Man game I ever played, and 6 was even more fun, so getting the full collection means I can enjoy both plus everything I missed for the other four games in the series. Currently still working on the first game.

I...haven't opened Little Kitty, Big City yet. I don't know why. It's an adorable game where you play as a cat. Why haven't I started it up yet? What's wrong with me?

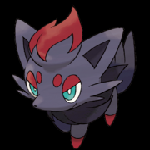
Pokemon proves to be just as fun as expected. I'm not sticking with the planned team I had in mind, though, but rather rotating out who I'm using for the next badge. I did manage to get a Zorua for the first time, so that makes me happy.

Splatoon is my current obsession, though. I've picked out two weapons to stick with, beat the DLC and keep going back to it for funsies, having a blast in Salmon Run, and even dabbled in Tableturf because why not.


Overall, I'm having fun. I'll put up more specifics about one thing or another later.

Share this post


Link to post
Share on other sites

I found myself gravitating towards two Splatoon weapons in particular: the Enperry Splat Dualies, and the Inkline Tri-Stringer.


Dualies are a weapon class introduced in Splatoon 2. Essentially, they're a pair of dual-wielded submachine guns. They have an interesting quirk of them being the first left-handed weapon you can have; all other weapons are wielded in the right hand, making peeking around right corners dangerous unless you're willing to expose your entire hitbox. The Dualies don't have that problem. Dualies also have a dodge roll; by pressing jump while firing, you'll get a rapid burst movement in a chosen direction. This can let you avoid shots and practically dance around opponents, and helps you fast fall if you need to go down quickly for whatever reason. Each dodge does take up ink, and there's a bit of a cooldown after your second dodge before you can dodge again. But the best part about the dodge is when you dodge, it combines the firing hitboxes and ups the rate of fire, letting you deal even more damage until you start moving again, which puts things back to normal. These are rapid-fire weapons that have a safety window that lets you get out of dodge (heh.) if things get tough.

The Enperry Splat Dualies is a variant of the default that has some very useful extra gear. Its sub weapon (secondary fire / grenade, basically) is the Curling Bomb. Throwing this will cause it to move forwards in a straight line, leaving a trail of ink behind you, before slowing to a stop after some distance and exploding. It can bounce off walls to get some unexpected hits. And you can charge it to reduce distance traveled but shorten its fuse; I've gotten some surprise kills with partially-charged Curling Bombs. The main utility for these, however, is getting to the center of the map quickly, or even getting deep into enemy territory quickly. Sometimes, working as a distraction is the way to go, and by surprising them in their own base, they're focused on you, freeing up your allies to cover more turf and gain ground.

The special weapon (ultimate / Final Smash) for the Enperry Dualies is the Triple Splashdown. This causes you to go up and then slam down on the ground, creating a powerful shockwave of ink that can instantly splat the enemy. It also creates two giant fists at slight offsets to your position which also create their own shockwaves. If you use this on a ledge, the fists can fall over the ledge to hit ground below you. This can work as a panic button if needed. One of the fun things here, however, is that you can use the Triple Splashdown while super-jumping to an ally (super-jumping basically being fast movement to an ally, spawn, or temporary jump point, letting you get to where you need to go quickly). If you jump to an ally and activate the Triple Splashdown, you'll skip the initial jump up portion of the special and just land with the impact directly. Enemies can see where you're jumping to and might try to spawn camp you, so landing with a Splashdown will be a huge surprise. The tradeoff for that is the fists don't appear, so you lose a slight bit of range. You and the fists can also be shot before landing, but the timing to get all three is fairly tight.

Overall, this is a very mobile weapon that can get in, cause trouble, avoid dying, get out quickly if needed, and creates an instant kill radius in a pinch. Very fun.


My second weapon of choice is the Inkline Tri-Stringer. Stringers were introduced in Splatoon 3, and they're basically a bow and arrow that fires three shots, aligned horizontally if fired while on the ground and vertically if fired while in the air. Tapping the fire button will just shoot a few spurts of ink. Holding the fire button will charge the shot, and reaching the first stage of charge will cause the shots to fire projectiles that stick into surfaces and explode after a bit. They have a wide spread, which can be good for covering turf and surprising enemies, hindering their mobility. But continuing to hold the fire button will increase the distance the shots travel and tighten their spread. At the second stage of charge, they're practically one shot with three hitboxes, and you're unlikely to hit multiple targets with this unless you're aiming close to a wall or something. But that just means that you're hitting them with three targets, any of which that miss will probably explode at their feet. And there's this oh-so-satisfying electric zap noise when all three shots connect with the same target. It's one of the best sounds in the game. Especially if you hit them from over cover; the shots arc, so you can shoot them even if they're hiding behind a wall, and getting a KO with that is the best feeling ever. Whether it's a direct kill or getting them with the splash damage, some of my favorite kills come from using this weapon.

For the Inkline kit, its sub weapon is the Sprinkler. This places a, well, sprinkler that covers the ground around it in ink. In Splatoon 1, the Sprinkler was one of the reasons I loved the N-ZAP '89 because of how much it covered turf to build up my special. It's received some nerfs since then, so I tend to replace it in a new spot as I go, but it can still be useful. If nothing else, placing it around a corner that the other team has to work to get to will help keep an area clean. And dropping it somewhere as a distraction can help; the other team wants to get rid of it, so they focus on it for a moment, which could be enough to let us advance and kill them. Put it in the right spot and it can also simply hinder their movement. It can also block a shot once before breaking, which is a very niche use but still potentially useful. Since the Tri-Stringer isn't the best at covering turf, the Sprinkler is good for making up for that.

The Special is the Super Chump. I mentioned super jumping before. Super Chumps create a lot of fake super jump indicators, but instead of decoy players landing there, it just places explosives. These explosives can be destroyed before they blow up, but if they're left alone, they not only cover more turf over a decently large area, but they can get a ton of surprising kills from people who were too close to one they didn't see or didn't think was close enough to get them. I have gotten several surprising kills with this special.

Overall, this is a decent long-range weapon that can cover a surprising amount of turf, with incredible potential for kills if you master its firing arc.


My main goal is to have one weapon of each of the eleven weapon classes as my go-to for that class. Two down, nine to go, and I think I have an idea for four of them...

Share this post


Link to post
Share on other sites

I rebooted the thread and promptly did nothing with it. Go figure.


A while ago, Splatoon 3 had its big final Splatfest, the aptly-named Grand Festival. People were convinced that this meant that Splatoon was done with adding new content. No new stages, no new weapons, just maybe some bug fixes or balance changes here and there.

Surprise! Version 10.0.0 added an old returning stage and 30 new weapon kits! Naturally, I had to try out each one of them just for a bit, and...

I think I've decided on what weapons I'm gonna use for a few categories. In fact, this prompted me to firmly lock down a weapon for all categories even if it isn't a kit from this update.


The Slosher class was perhaps the funniest weapon class in Splatoon 1, and probably still is in general. Basically, it's a bucket. You glug ink out of a bucket. That's the weapon. Very ink-hungry, you have to tap the fire button every shot, but the shot fall-off keeps the same damage as the direct hit. It just...takes a bit to get used to.

My slosher of choice is the new Tri-Slosher ASH-N. Tri-Sloshers throw three ink blobs at once. It has probably the widest slosh and the fastest fire rate (least cooldown between shots), but it's also the shortest range. Still, faster fire rates are something I prefer, even for tap-fire weapons.

The sub weapon for the ASH-N is the Splat Bomb. This is the most basic sub weapon in the game. It's a simple explosive, really. A grenade. It has an instakill radius and a good sour spot radius outside of that. The sour spot damage is juuuuust too low to get a two-hit kill when paired with the slosh, but that's small potatoes. The splat bomb detonates after being on the ground for one second, so if you figure out just the right spacing to roll it off of ledges, it could be a surprise instakill for people below it. Plus, nobody wants to be where a splat bomb is, so they'll move out of the way. This can force a retreat, cut off a retreat, or scare someone out of a hiding place. As a bonus, the throwing radius for sub weapons is farther than the slosh distance, so you can do something to opponents that are a little too far away to deal with.

The special weapon is the Splattercolor Screen. When you set it up, it creates a large 'wall' over an area that slowly moves forwards for a bit. Any opponent that goes through it takes 40 damage, which pairs nicely with the Tri-Slosher's 62 damage for a good 2-hit kill. The screen also hampers the enemies vision, shifting everything to grayscale and making it harder for them to spot details. It also puts particles and a sound effect on them so people would be able to spot them even if they're hiding in their ink. All this also means that opponents don't want to go through the screen, so they'll go around it, which makes their movement predictable. It's also physically opaque for most of it, which can obstruct enemy sightlines. The downside is it's opaque for allies as well, and between that and the low damage, it's not seen as a particularly good special. Still, I like it. If nothing else, using your special instantly refills your ink tank, which is always a plus on an ink-hungry weapon like a slosher.


The Brella class, added in Splatoon 2, is full of shotguns built into umbrella handles. Basically the spy umbrella from Kingsman. Tap fire to fire off a spread of ink bullets, as expected. The spread is generally wider the further away you need to hit, which can help do chip damage at a distance at least. Hold the fire button to fire one shot and then unfurl the umbrella canopy. The canopy acts as a shield that can block shots until it's broken. This can save you in dangerous situations. The shield can break with enough damage but regenerates over time, broken or no. And continuing to hold the fire button will cause the canopy to detach and move forwards like a mobile shield. The canopy leaves ink behind it and frees you up to move without it, letting you fire your weapon without having to worry about accidentally holding the fire button too long and opening your shield when you'd rather shoot.

And my Brella of choice does absolutely none of that. The Undercover Brella is literally the spy umbrella from Kingsman, complete with transparency-from-underneath and everything. Since the canopy doesn't detach, you can hold the fire button to shoot continuously, treating it like a Shooter with a built-in shield and a wide spread of bullets. The trade-off is that it has the weakest shots and the least durability for the canopy. Still, it's my preferred brella.

I was very close to locking in the vanilla Undercover Brella as my kit of choice, but the new update added the Patternz Undercover Brella, and after trying it for a bit, I decided 'This one. This one is the one.'

The sub weapon on the Patternz is the Curling Bomb. I've already talked about this one. Since the Undercover is a fairly short-range weapon, the Curling Bomb can easily help with mobility, getting further into enemy turf. Between getting in their backline and having a shield, I can bother them when they respawn while having a small measure of safety, which means they're dealing with me close to their spawn instead of dealing with the rest of the team at the center, letting the team push the objective. Getting to their spawn is probably the best use for the Curling Bomb in general.

The Special is the Killer Wail 5.1. This fires six lasers (they're sound waves, but who cares), in three pairs of two, that can target a player you're looking at. The targeting and lasers don't care about obstacles, so you can be at spawn and target someone who's behind literally all the cover in the universe. These lasers track them as they move, but there's a bit of a delay between target movement and laser movement, so it can be avoided; heck, you can keep ahead of it just by walking sideways casually. But that, once again, forces them to move. It takes basically no time being touched by the laser to splat someone, so moving is key to stay alive. Remember, though, that there are three pairs of lasers, and there's a slight delay between each pair firing. If you move sideways, each pair fires at different angles, and the farther you're moving, the farther the angle, making it that much harder to dodge. You can also make each pair target someone else instead, letting you put pressure on up to three opponents at once. There's also the quirk that the lasers go through anything, and that they don't stop when they hit their target. You can hit multiple people with these if aimed right. The lasers persist for a bit whether they hit their target or not, even after splatting their target, so they can absolutely continue to bother people until they stop.

Overall, a good kit in my mind. It can bother people anywhere on the map and have at least a few moments of safety even in the thick of things.


Related to Splatoon, I have a question. Which would you rather travel by: Land, Sea, or Air?


Unrelated to Splatoon, how do I have eighteen shiny Pokemon in Pokemon Violet after 250 hours of playing, only two of which had boosted shiny odds, where over 300 hours of playing Leaf Green plus Arceus knows how many more hours playing Sapphire, Silver, White, Soul Silver, Pearl, Gold, Emerald, and Crystal only resulted in a combined five, two of which are fixed to be guaranteed shinies?

I know how. It's because of changes to how shiny Pokemon spawn.

It used to be that the game could only generate one new Pokemon at a time. You walk into the grass, game rolls the encounter dice. If it lands on 'spawn something', it puts you in a battle with a Pokemon. Is it shiny? Let's roll the 8192-sided dice and see if it lands on 1. No? Not shiny. End the battle one way or another, you're now out in the overworld. Trigger another encounter. Is it shiny? No. Try again. End battle. Encounter a Pokemon. Shiny? No. Try again. Shiny? No. Try again. One. At. A. Time.

Yes, Pokemon Diamond/Pearl/Platinum and Black/White/Black2/White2 had circumstances where you could encounter two Pokemon at once. But that basically means that's two rolls of the 1/8192 shiny chance. Only two.

Pokemon X and Y doubled the base shiny odds from 1 in 8192 to 1 in 4096, where it has remained to this day. But doubling the base shiny odds doesn't seem like it would help that much. So what really changed?

Pokemon Let's Go Pikachu and Let's Go Eevee happened. These games made it so that Pokemon generate in the overworld, and in large numbers. Basically allowing the game to roll the dice on shiny odds without having to actually force a battle. You can see that these Pokemon are not shiny and just move on, go somewhere else in the area so the old ones despawn and new ones spawn in. You don't have to waste time forcing an encounter. You don't have to waste time in battle. You can just walk away. And this has carried over to Sword and Shield, Legends: Arceus, and Scarlet and Violet, and it looks like it'll be back in Legends: Z-A as well and very well might be a series staple going forward.

Scarlet and Violet generate 15 Pokemon in the overworld at once. Fifteen times to roll the 1/4096 shiny odds, which I would say is roughly about 1 in 273 odds (I don't know if that's how it works; I'm not a statistics major). Disallowing certain fixed encounters, if the game does generate a shiny amongst that 15, it removes the shiny from the count and spawns a 16th Pokemon. So if you're standing still and count 16 Pokemon around you? One of them is shiny.

In fact, due to all of this, it's practically guaranteed that people are going to pass shinies without even knowing. Some Pokemon have shiny colorations that are incredibly hard to spot due to barely being any different color-wise or due to the Pokemon being incredibly small. My fourth shiny just looks slightly desaturated compared to its usual coloration.

That doesn't explain the fact that I got my first shiny in this game within an hour of playing, that I got my first shiny in the DLC within the first half hour, that I literally ran into a random shiny while training my team, or that I left the menu and saw a shiny basically standing next to me twice.

I don't even have the Shiny Charm yet, which is a key item that permanently triples the base shiny odds. What the heck is this? What is my game's RNG seed that lets this happen?

(and would you believe the Switch 2 version ups the number of overworld spawns to thirty-six? For about 1 in 114 odds? it also ups the spawn radius, though, so it's easier to miss ones that are farther away)

Share this post


Link to post
Share on other sites

Which would you rather travel by: Land, Sea, or Air? Well, the results are in, and the winner is... Team Sea! Congratulations to Team Sea! I was on Team Land, but second place is not bad. I'm more glad that Team Air lost. Nothing against air travel, but the third team has been on a winning streak lately, and that cannot be allowed.


So, more Splatoon weapons.

Shooters are the default guns, by which I mean both the beginner training tool gun and the default singleplayer gun fall into this category. Semiautomatic weapons, this class boasts a wide variety of fire rates, damage outputs, ink coverage, ranges, and shot accuracies to suit any play style. There's generally a shooter for any niche. Want something long-range? Go for the Jet Squelcher. Want high fire rate? Try the Aerospray. Damage? The .52 Gal and .96 Gal are literally 2-hit kills. Coverage? Sploosh-o-matic. Pick a role, there's a shooter for it, and I've probably been killed by it.

While the default Splattershot is more or less the most average of all the shooters, I found that the N-ZAP almost works better in that role. The N-ZAP '89 was my main in Splatoon 1 due to its combination of Sprinkler and Inkstrike, but that particular kit no longer exists, both sub and special have been significantly changed, and both N-ZAP kits have different things. I still love the main gun, though, and I've tried out both kits with it enough. But I'm thinking the '85 is the one I'm gonna stick with this time around.

Its sub weapon is the Suction Bomb. I haven't found myself using this as often as I probably should, but it's a very good kill weapon, able to check around corners, throw it over walls to push snipers out of their nests, make people panic, the whole shebang. More specifically, the Suction Bomb will stick to any surface it lands on and explode after a bit. The hitbox is deceptive; if you can plant it on the corner of something to where the suction is kinda peeking above the wall itself, what's on top of the wall is now in the blast radius. I have died so often to that annoyingly weird hitbox.

The Special is kind of a weird one. The Tacticooler. This one isn't an offensive special. It isn't a defensive special. It's a support special. Placing it down will give anyone nearby a very good boost to movement speed of all varieties and makes dying less punishing in general. Very much a team-oriented special, but Splatoon is a team vs team game. It can also act as an obstacle if you think that'll help.

Overall, the 85 isn't meant to go it alone. It's geared towards team support, helping handle up-close enemies and pushing objectives.


Splatlings are the game's gatling gun class. Holding the fire button charges it up, and longer charges mean more shots fired. Every Splatling can kill a player in one charge with plenty to spare, provided your aim is good, but the turf coverage from a buhmillion ink bullets everywhere can slow the enemy down even if you don't kill them. Most of them are good as basically turrets, where you just pick a spot and stay there, shooting anything below you.

My Splatling of choice is the Nautilus 79. The Nautilus has two things that make it different from the other splatlings. The first is called Midfire Charge. Normally when firing, you can't recharge until you're done firing, unless you stop firing entirely by going into swim form and starting your charge from scratch. The Nautilus (and also one other, but that's not relevant right now) can interrupt its barrage by charging. With this, you basically never need to stop firing until you run out of ink, just marching forwards or sideways constantly unleashing a never-ending barrage like an unstoppable Terminator. The second thing, unique to the Nautilus among splatlings (all but two Chargers have it), is Charge Storage. If you're holding the fire button, entering swim form does not get rid of your charge for a few seconds, letting you move to a new position, go back to kid form, and fire from there. It's great if you need to reposition for a better shot or want to charge behind cover first. The downside of charge storage is you visibly glow in swim form if you're holding a charge, meaning enemies can see you. While the Nautilus doesn't have the best range of the splatlings, Midfire Charge and Charge Storage give it some particularly good mobility to make up for that.

Its sub is the Suction Bomb and its special is the Triple Splashdown. I've talked about both already. Working with the 79, I'd say this kit's only weakness is being outranged. It's a splatling, it doesn't have to stop firing, it can hold its charge to reposition for a better shot, it has a sticky bomb that scares people into your gun if it doesn't kill them outright, it has a close-range panic button, it has pretty much everything.

Share this post


Link to post
Share on other sites

A couple more Splatoon weapons to throw at you.


Blasters are the only weapon in the game whose shots are not affected by gravity. They travel in a straight line and then explode! A direct hit is (usually) an instant kill, and the blast radius is usually fairly substantial. If anything in the Blaster category is trying to shoot you, you want to move as soon as possible, because two hits are usually enough. The thing is, though, you want to go for the sweet spot to guarantee a kill, or for the weaker ones, to guarantee that a miss will finish the job. The biggest problem of Blasters is fire rate; while you can hold the button to continuously shoot, the spaces between shots tend to be abysmally long, and the ones with faster fire rates tend to not be instakills with a direct shot.

My pick, the Rapid Blaster, is a bit on the weaker side when it comes to direct damage, but the main draw from it is it has a bit more range, making a missed shot a little less punishing if they can see me (it has more range than the Range Blaster, oddly enough). The longer range means the blast radius isn't the best, though. The fact that it's a long-range blaster means I can bother enemies that are over there. There is a blaster with a longer range, but I'm largely sticking with the Rapid because the fire rate suits me.

Its sub weapon is the Ink Mine. This is a landmine that deals 40 damage if you're in its blast radius but also places a tracker on people that are too close when it goes off. You can also manually detonate an Ink Mine by placing more somewhere else; you can only have two, so placing a third will pop the first. It also goes off if the spot it's on is covered in too much enemy ink. Still, placing these in chokepoints can help big time with telling the entire team that someone's making a push, plus that damage works well with a lot of weapons to finish someone off or leave them vulnerable to be finished off. Placing multiple ones next to each other can be a fairly good surprise.

The special is the Triple Inkstrike. The Inkstrike in Splatoon 1 was my favorite special because I could just tap anywhere on the Wii U touchscreen to drop an inkstrike in the deepest recesses of the enemy base from anywhere on the map. Understandably, that is no longer an option. The new version drops the same kind of blast, but three of them, with the tradeoff in that I have to throw targeting beacons to tell them where to land. So the inkstrikes only land within my throwing range. Still, they're excellent for hitting above them, halting advances, checking for hiding points, scaring snipers, cutting off escapes, killing, the whole works. A...weird thing with them is that while they extend infinitely upwards, they don't extend infinitely downwards, so if you hit too high on a wall, the ground at the bottom of that wall might be completely safe. Some maps have bridges to watch out for in that regard.

I'm not 100% sold on this blaster, but it kinda works for me for now. I'm not sure if all parts of it have a lot of synergy with each other; it's more that I like all of its parts individually and I'm willing to work with them.


Splatanas are the other newest weapon class added in Splatoon 3. They're swords, pretty much. They have a melee attack and a sword beam ranged attack, and if the melee doesn't kill them you hit them with both. You can also charge them up so both melee and ranged do more damage, and in this case the charged melee is an instant kill even on the weakest splatana. Holding forward while using the charge attack causes you to lunge forward to maybe bring someone into melee range and otherwise get a bit more distance out of the ranged attack. Splatanas are also a true ambidextrous weapon; the swing animation switches from one hand to the other with each swing while the shot fires from dead center regardless.

My Splatana of choice is the Splatana Wiper. It has the fastest swing of all of them, which works for me as I don't like to be caught between shots when the enemy closes in. This also means it has the least range and lowest damage of all of them, but it has the fastest charge time, which is a plus. The fast fire rate plus the sword beam making a long thin trail of ink means it basically is a discount Curling Bomb, letting me do my favorite trick of getting into the enemy base quickly.

Its sub weapon is the Torpedo. If you just throw it, it usually flops to the ground and blows up. But if an enemy comes in range before it hits anything, it will stop in mid-air, turn to focus on them, then moves towards their position. If it hits them or the ground, it also drops a scatter of additional (albeit weaker) bombs around it. Great for covering turf around the enemy. Equally great for checking if someone is nearby, especially in hiding places as it targets through walls. Since it targets the first enemy that comes in range, throwing it to the side of an enemy out in the open could reveal a second, hidden enemy nearby, waiting in ambush. Information is just as good for this sub as damage. The biggest drawback is that the enemy can see where the torpedo is going to hit and can easily move, or they can just shoot it directly to get rid of it completely. But that has its uses too, such as scaring them away or causing them to focus somewhere other than on the wiper user right in front of them.

The special is a fun one. Ultra Stamp. You take out a giant stamp and slam it down in front of you, moving forwards as you do, basically playing Hungry Hungry Hippos as you rush forwards in a giant stomping hammer of death. The stamp has a deceptively large hitbox, meaning them moving past you could kill you. And you're stamping along for a little while making it actually very easy to get into enemy turf unharmed with this. You can be hit while stamping around, admittedly, but depending on where you are and how tightly you take corners, this might not be an issue. The other thing about it is that instead of stamping forward with it, you can throw it. When thrown, the Ultra Stamp is a massive 'run the f[tweet!] away' missile that will kill you if you don't get the f[tweet!] out of dodge right the f[tweet!] now. It has a stupidly huge damage radius when it lands, which was buffed in one of the recent patches.

Overall, this is my favorite sword. It has the usual hallmarks of 'able to get into the enemy base quickly' and 'bomb subweapon for checking hiding places' and 'great firing rate'. But with the Ultra Stamp? This is just plain fun.

Splatoon sometimes has something called Challenges, where they either tweak the game's stats (increased jump height), lock you into a preset type of weapon (Brellas only), both (Ultra Stamp only but specials charge faster), give you a random weapon, or throw fog onto the arena, all while the game is set to one of the four Ranked battle modes rather than the more casual Turf Wars mode. The first Challenge I ever participated in was the Ultra Stamp + faster Special charge challenge, and I had a lot of fun with it. It was like not even fifteen seconds into battle and there was the absolute chaos of eight Ultra Stamps stomping around trying to see which hippo is hungrier. It was glorious. It was also the first time I ever participated in the Tower Control gametype, which I normally avoid like the plague, and I honestly didn't mind because the stamp challenge was too fun.

Share this post


Link to post
Share on other sites
3 hours ago, Zorua said:

A couple more Splatoon weapons to throw at you. . . .

Is tossing the weapons an effective strategy?

Share this post


Link to post
Share on other sites
18 hours ago, Darth Fluffy said:

Is tossing the weapons an effective strategy?

It is with the Ultra Stamp. Seriously, that buff to the throw impact kill radius is terrifying.

Share this post


Link to post
Share on other sites

I thought I had an idea of which Splatoon weapon I wanted to main in each class, but three of them are resisting me a little. The issue isn't with finding a kit that works. The issue is with the classes themselves. None of them really work with my playstyle. Rollers are too close range, except for the ones that are either stupidly slow or can't get kills reliably, so I'd pretty much exclusively use them for painting, which puts the rest of the team in a 3v4 situation which isn't ideal. Brushes rely on button mashing to do basically anything, which isn't exactly great. And Chargers favor precision over long distances, which I struggle with. I have an idea of which ones I like best, but it's more of a 'least bad for me' situation than an 'I'd use this a lot' situation. Personally, I'm not going to use these classes much.


Also, is it weird that the level cap in Splatoon 3 is stupidly higher than it has any reason to be? The most rewards you get for leveling up is unlocking all the weapons, the last of which are unlocked at level 30. The level cap is nine-hundred and ninety-nine. WHAT? There's also the Tableturf Battle card game, which you can only ever unlock either more NPC opponents or cosmetics as rewards for progressing. The last prize from this mode is unlocked at level 50, and even then the most desirable is probably the level 30 reward. The level cap for Tableturf is also 999. WHY? Why are these numbers so high? What is the point? Who is going to play Tableturf past level 30? Why couldn't you cap it at like 99? Still high but more reasonable. And apparently it used to be capped at 50 for Tableturf, but it was upped to 999 in an update! Why? Who allowed this?

The only thing in Splatoon 3 where reaching level 999 has a practical effect is the PvE mode Salmon Run, where having higher ranks ups your difficulty, although you raise rank by 20 points per match in that mode and can lose rank easily too, so there's that trade off.

Share this post


Link to post
Share on other sites

I've been trying to play more Splatoon. Trying, being the operative word here. Stupid TV hogs on my day off- Anyway...


I think I've mentioned before, a long time ago in a forum thread far, far away, but Splatoon has more multiplayer modes than just Turf Wars. That's the casual mode and the only multiplayer mode you have access to at first, but once you hit level 10, you can go into Anarchy Battle, the main competitive Splatoon format, which has four different objectives available as well as a ranking system. The modes are: Splat Zones, Tower Control, Rainmaker, and Clam Blitz.


Splat Zones is analogous to the King of the Hill gametype in other games. You have a spot on the ground that you need to control. Applying Splatoon-style gameplay to that means you have to cover the zone with your team's ink to claim the zone, but if they cover it enough, you could lose it and then it's a race to get it back before they claim it for themselves. When you have the zone, a timer ticks down from 100 to 0. Once it hits 0, you win. There's also a five-minute timer, and if nobody wins by knockout, whoever has the highest score at the end of the five minutes wins. Unless! The team that's currently losing has control of the zone, letting it go into overtime until they lose the zone or overtake the leaders. There's also a penalty system, where if your team has the zone, then loses it, then the other team takes the zone, you get an extra timer that has to reach 0 before your main timer does, like you were pushed back and have to make up for lost time.

I take the Inkline Tri-Stringer into Splat Zones. Between being a long-ranged weapon, one with curved shots to hit over obstacles that they always seem to place right in the middle of the zone, and having the Sprinkler and Super Chump to cover turf, this is absolutely the weapon for me for zones. I've also seen the N-ZAP '89, the N-ZAP kit I don't use, which also has Chump.


Tower Control is the Payload gametype. In the center of the map is the 'tower', a box with a short spire in the middle. If someone is standing on it, it moves along a fixed track towards a goal close to the other team's spawn, with at least one 'checkpoint' in the way where the tower stops and has to wait for a bit before moving again. If people from both teams are on it, it stops. And if nobody's on it, it slowly moves back to the center. As the tower moves, it ticks down a distance counter; like with Zones, whoever gets to the final goal wins by knockout, and whoever has made it farther after five minutes wins the time-out, but being on the tower while you're losing lets you go into overtime until you lose the tower or overtake the other team's score. The major downside of playing Tower Control is the very small place for people to stand on the tower, making it incredibly easy to hit whoever's on it. Basically every Blaster can cover the tower. There's practically nowhere to hide from Chargers or Splatlings or precise weapons like the Jet Squelcher. One barrage of Tenta Missiles or Triple Inkstrike or Booyah Bomb can completely clear the tower, leaving it free for the other team to grab it. The fact that the tower moves relatively slowly and on a fixed track makes it a huge target.

I have only participated in Tower Control twice, both during Challenges which are events that modify the game's stats somehow. The first of those I talked about already, the Ultra Stamp challenge, had limits on what weapons could go into it. The second, increased jump height, had no such limits, and I was fully vindicated for why I never touched Tower Control until the Stamp challenge. It is the one mode that I will refuse to participate in during normal rotation.

But if you want recommendations for weapons for it, Chargers (especially the Splat Charger, E-Liter, and their scoped variations), Blasters (vanilla and Range Blaster are probably good go-tos), the Jet Squelcher, and the Heavy Splatling, Hydra Splatling, and Heavy Edit Splatlings are probably safe bets due to their range, as well as anything with the Killer Wail 5.1 or Tenta Missiles specials. I do not recommend being the brave fool trying to actually stand on the tower.


Rainmaker is the VIP gametype. In the center of the map is the Rainmaker which is protected by a forcefield. Shooting the forcefield will eventually cause it to burst, usually KO'ing nearby enemies. Grabbing the thing fully replaces your main weapon, sub weapon, and special weapon with the Rainmaker, whose only means of attack is a slow-charge explosive shot. The Rainmaker itself is also a heavier weapon than any regular weapon, so you move slower. Plus, it glows, revealing your location to everyone on the map, even through terrain. You and your team need to work together to get to a checkpoint and then a goal moving further towards the enemy spawn. Any time the Rainmaker holder dies, or when it's planted on a checkpoint, you have to pop the shield again. Like with Tower Control, distance determines score.

Despite the huge similarities in objective to Rainmaker--massive target on the objective's back, pushing the objective is very predictable due to the fixed locations of the checkpoints and goals, slow movement--I actually like Rainmaker the most. The back-and-forth for the Rainmaker is incredibly enjoyable, the Rainmaker can move side to side to dodge shots, taking cover behind terrain is possible, the Rainmaker has a long-range attack that anyone can use regardless of their weapon's usual range... It's just fun.

Since movement is a huge part of Rainmaker, I like the Enperry Splat Dualies for this mode as it can help create a path right before grabbing the Rainmaker for easier movement, or to help the team of course. Plus being able to dodge around the opponent's Rainmaker shots is also great.


Finally, Clam Blitz. I'm not sure if this has a comparison in other games, at least not enough to get a common name for the gametype like with KotH, Payload, and VIP. Anyway, this one has lots of little clam shells scattered around the stage. Picking them up has them trail behind you and gives you the option to throw them. If you collect 8, they merge together and turn into a Power Clam, which looks like a(n American) Football. Like with the Rainmaker, Power Clams are visible to everyone on the map. The point is to take them to a basket closer to the enemy's spawn and throw a Power Clam at it to open the basket up. Once the basket is open, clams and Power Clams can be thrown into it to lower a score counter. There's also a short timer for how long the basket remains open before it has to be broken again. Once a basket closes, it drops another Power Clam for the other team to grab; if your team breaks the opponent's basket and doesn't keep it open, the other team gets a Power Clam for free. The game refuses to allow ties; if each team breaks the other basket exactly once and doesn't get any other clams into it, the team that broke it second will get their counter pushed back by one, so the first team to score has a one-point lead. There's also a penalty thing like in Zones. And, of course, first to zero wins, lowest score at the bell wins, game goes into overtime if the losing team has a Power Clam in existence at all.

In terms of how much I like this mode, thinking about it I'd say it's my third favorite Anarchy mode, above Tower but under Zones. While the back-and-forth can be pretty fun, the fact that if you open the basket your team has to stay in a very predictable location in order to push the score further can be a bit punishing. That said, it's very satisfying to be the one to keep the basket timer going. It's also satisfying to get multiple Power Clams in the basket at once, dealing huge chunks to the score. The main issue is the maps, since some of them are great for Clams and others are very punishing for the team that's not in the lead (although that might just be a skill issue, honestly). Because getting deeper into enemy turf and not dying are how you progress this mode, Enperry Dualies are still my go-to.


I realize I'm not selling Clam Blitz very well, or Tower Control at all, for anyone who might want to give them a try (assuming anyone here or any lurkers stopping by--I know you're there, don't pretend I don't--want to play Splatoon, anyway). Honestly, I might try Tower Control with the vanilla Tri-Stringer instead, which has Killer Wail 5.1. Maybe I'll do better in a backline role for Tower.

Share this post


Link to post
Share on other sites

I keep creating this thread and then forgetting it. Why.

I may actually end up taking a break from Switch games for a bit. One of the controllers is broken. Not to the point of nonfunctionality; it's just that the casing is coming apart and needs to be held together with tape. I'll need to replace it, so I'll have to see if I can ship it in to get a replacement copy or if I have to shell out for a new set entirely.

But that means I won't be able to actually play any Switch game until the new controllers arrive. I might put it off for a bit, actually.

Separately, I'll have to take my computer in to get fixed. The computer works perfectly fine, however my headphones broke in a way that the headphone jack is stuck in the audio port, meaning even if I had speakers, which I don't, my computer would likely prioritize putting audio through the headphone jack, which is currently not connected to any headphones. I have to take it in to get the pin removed.

But that means I don't have audio in any PC game either. Which not only means I can't play most games on PC (some I could play without audio, but others either have voice acting, really good music, or both), but I also can't listen to any music on PC, watch YouTube, or mess around with music programs like MuseScore.

It also means I can't play Switch games on my PC, since connecting the Switch dock to the monitor only transfers video, and I have to use the headphone jack for audio, which...I have no headphones. Playing it undocked means I'm playing in handheld mode, which has a smaller screen, which is a non-starter for

All of this is dollar signs fluttering away in the breeze and an inability to play certain games for certain times.


I did, however, manage to reach S rank in Splatoon. The jump in skill level though...

Share this post


Link to post
Share on other sites

Splatoon has just wrapped up its seasonal Big Run.

Salmon Run is the game's PvE horde mode. You get a job working for Grizzco and have to go to areas inhabited by Salmonids in order to collect Golden Eggs from them. Basically you turn your brain off to the lore implications and kill sapient salmons for fun and profit.

Each shift has three waves, and you have 100 seconds to complete a wave. You have to collect enough Golden Eggs to fill a quota for each wave; fail to do so after 100 seconds, or if everyone dies, and you lose. Complete three waves, and you win. Lose in the first two waves causes your pay grade to go down while wiping on the third keeps it even and winning raises it; higher pay grades have higher quotas and more frequent enemy spawns and can make for a fun challenge.

As some added fun: each map rotation gives you four weapon options, and you don't get to choose them. If it says you have these four weapons for the map rotation, each shift distributes one each of those weapons to your crew, and reshuffles them to other members between waves. Some map rotations have question marks instead of weapons, and a question mark weapon could be literally any main weapon in the game except the scoped snipers, including the intentionally overpowered Grizzco Weapons, which only show up on random weapon rotations. A four-question-mark rotation means you might never see the same weapon twice in one shift amongst anyone on your crew, but a four golden question mark rotation gives you only Grizzco Weapons.

Oh, and you only have Splat Bombs as your sub, your special is random every shift and not every special is available here, and you can only use your special twice in the entire shift. It's best to use them early to get out of tight situations rather than save them for later waves.

The normal enemies, or "lessers", don't drop Golden Eggs but spawn in much higher numbers. Even the weakest of them can kill you if you've taken a little damage from other sources or aren't paying attention. Managing the hordes is crucial to avoid getting overwhelmed. Sometimes you might want to slip past them to grab an Egg, but their attack hitboxes come out quicker than you expect, so it's a bit of a risk.

Boss Salmonids are the meat of the mode, since they're the ones that actually drop Golden Eggs. They usually have some kind of gimmick that mimics a Special Weapon or other powerful attack. Out of all eleven Bosses, by far the worst of them are Flyfish, Stingers, and Fish Sticks.

Fish Sticks spew ink all around and are hard to get to since the actual boss consists of eight tiny guys flying around the top of a tall tower that several weapons can't effectively deal with. The ink hinders your movements, which makes it easier for bosses and lessers to get you. While it's incredibly rare to actually take damage from their ink, the hindrance by far elevates them to 'priority target'.

Stingers can shoot you from across the map (literally; they target whoever is farthest away from them), and their shots are laser beams that go through walls that they keep firing for several seconds and can hit people other than their target who happen to be in the way (please, get away from me if you're the one they're shooting at; I have been killed by Stingers targeting someone else too many times because the target was too close to me). Plus the nature of their hitboxes means that some weapons have to fire seven times in order to deal with them while lessers and other bosses swarm around you. It's even worse when there's more than one, sometimes on opposite sides of the map.

Flyfish are the worst, though; they shoot missiles at you from across the map, and they can only be damaged by explosions in their missile pods while they're open, meaning they can't be hit unless they're shooting at you. Plus you can only throw one bomb per ink tank, meaning if you take out one of their pods, you have to wait in ink to reload in order to hit the other, while it's shooting you. Certain weapons and Specials can handle that without the bomb, but if you don't have them and your team is busy elsewhere, you're basically a sitting duck hoping you'll regain enough ink and not get hit by anything in the process to hit the other pod before it closes. More likely these are the ones you'll be using your Special on.

The more rounds you play, the more a "Salmometer" fills up. The collective sum of all four players' Salmometers increases the odds of a fourth Xtrawave happening. If an Xtrawave triggers, a King Salmonid spawns. They have a stupid amount of health and usually difficult attack patterns. Your goal is to defeat the King Salmonid. During an Xtrawave, you have one use of your Special (regardless of how many you had left at the end of wave 3) and you can fire Golden Eggs as ammunition. Failing to do so does not cause you to lose rank. There are three types of King Salmonid, but there's also a Triumvirate, where all three show up at the same time (albeit with less health each to make it fair), meaning you have to deal with all three of their attack patterns at once. Here, you get two uses of your Special, and you're guaranteed to get nothing but Grizzco weapons.

Dealing damage to King Salmonids at all will give you a Grizzco-specific currency for the Grizzco shop. You also get Grizzco currency, regular currency, and PvP gear just for participating.

So what's Big Run? Well, normally Salmon Run happens on one of seven Salmon Run-specific stages. Big Run instead places it on regular PvP stages, framed as the Salmonids invading the city! Only six PvP maps have been used for this (technically seven, but the seventh was specific to a limited-time event and cannot be accessed again), some of which work well for Salmon Run and some don't (this map was surprisingly good for it). Big Run also awards you with decorative prizes depending on the highest number of eggs you collected during a shift during Big Run. I hit my personal best and got the gold medal award during this one. I also came so close to defeating a Triumvirate for the first time ever, but it had just a smidgeon of health left. So close...

Oddly enough, in-game lore says this used to happen once every 70 years during migrations, but the fact that it's happening once every three months now is acknowledged in-universe. I wonder if Grizzco's habit of taking Golden Eggs since 2017 has something to do with it...


Immediately after Big Run was another Challenge, and this one limited you to using only Splatling weapons. While I did revert to the Nautilus 79 after a bit, I initially wanted to try out the Heavy Edit Splatling Nouveau.

The Heavy Edit Splatling has an interesting quirk. While it has the same distance and 26-damage-per-bullet regardless of how long you charge it, at full charge the fire rate massively increases, going from 15 shots per second at partial charge to 20 shots per second at full charge. With four bullets to kill, this thing goes from killing in a fourth of a second to a fifth of a second, which might not seem like much but that tiny bit of more time for them to react compared to my ability to aim and adjust fire and keep the opponent in the targeting reticle can mean all the difference.

The Nouveau kit has the Splat Bomb which is always fun and useful, but also Crab Tank, which is why I picked it for a Zones map. Crab is basically a crab-shaped mini mech of awesomeness. The pros: the primary fire is an increasing-rate bullet spam with very long range, good for painting over distances and hitting foes, including hitting them behind cover since the shots arc a little. The secondary fire is a stronger explosive shot that has a steeper arc and thus can hit around closer obstacles better as well as hurt people around corners. (it's also good in Salmon Run against Flyfish for that purpose). It also has a bit of armor from the front, protecting you from shots. You can also "enter swim form" with it, by which I mean it curls up into a ball and completely protects you, allowing you to roll along any surface and even up inkable walls to reposition for a better angle. The cons: it has a slow turning radius in fire mode, the armor can break thus reducing the time you have in your special, and probably the biggest weakness: you. You are sitting on the back of the thing, meaning your hitbox is still just as vulnerable to attack as you are normally. If someone shoots over the crab to headshot you, or just walks around and hits you in the back, you're out of luck.

Crab is best used at a distance, to minimize your opponent's ability to flank you. Remembering that you can tuck into ball mode to protect your inky behind is important. As a fun fact, I once got a kill by running someone over with Crab in ball mode. It's hilarious!

I think the main reason I switched back to the Nautilus, though, is that not having Midfire Charge was messing me up. I did better after the switch.

Maybe I should've tried the Ballpoint Splatling instead. That one has Midfire Charge...

Share this post


Link to post
Share on other sites

Minecraft news!

I am horribly behind in saying anything about Minecraft. So. Things added since last time I talked about it. These are only the really notable stuff; there's a lot of things that are too nitpicky to mention or are technical things that don't matter to most people.


1.19.3

  • Spawn eggs for the Ender Dragon, Wither, Iron Golem, and Snow Golem. (Ender Dragon and Wither eggs are only available by commands)
  • /fillbiome command, letting you change the biome of the area.
  • New game rule allows you to turn off infinite water sources, and turn on infinite lava sources
  • Language support for Nahuatl and Rusyn
  • Vex model changed
  • Items in the Creative Mode inventory have been rearranged significantly, to make things more intuitive.

1.19.4

  • /ride command allows entities to start or stop riding other entities
  • Breeding horses no longer has the baby horse's stats biased towards the average of its parents', making it easier to breed higher-stat horses. (horse stats are running speed, jump height, and health)


1.20: Trails & Tales

  • Bamboo wood type, initially crafted using 9 Bamboo, plus a mosaic variant of the planks for more decoration options
  • Chiseled Bookshelf, can actually store books in it, up to 6
  • Hanging Sign, crafted using chains and stripped logs. Comes in all wood type variations. Can hang on the bottom of most blocks, including other hanging signs, and extend outward from walls, but can't be placed on the ground
  • Piglins now drop their heads when killed by a Charged Creeper. The head flaps its ears if powered by redstone or if the player moves while wearing it
  • Camel mob. Stands tall enough that zombies can't hit you if you're riding one. Two people can ride it. It walks slowly, but you can make it 'dash' forward, which could be used to cross long gaps.
  • Language support for Lao and Yakut.
  • Blocks that can be dyed used to only allow you to dye white versions of them. Now you can apply dye to any color of them. This applies to beds, carpets, and wool.
  • Cherry Grove Biome, generating on tall mountains
    • Cherry trees, complete with wood, leaves, and saplings. We finally have a pink wood type. The leaves also have pink cherry petal particles.
    • Pink Petals, a new flower type that spawns in the Cherry Grove. You can place up to four on one block, and it rotates based on what direction you're facing when you place it. I use it to hide Tetris pieces in the foliage.
  • Archaeology game mechanic
    • Trail Ruins structure is found just barely poking out of the ground and must be excavated to uncover all its goodies
    • Minor tweaks to the existing Desert Pyramid, Desert Well, and Ocean Ruins to also allow the Archaeology mechanic
    • Suspicious Sand and Suspicious Gravel, found in the above structures, have goodies hidden inside of them, but mining them or dropping them with gravity destroys them completely. You have to use the...
    • Brush, crafted using sticks, copper, and feathers. Used to dig items out of suspicious sand or gravel.
    • Pottery Sherds, of which there are 20 in this update, each of which have a different image
    • Decorated Pot, made using bricks or pottery sherds. Fill your base with urns that tell a story.
    • Relic music disc, playing a chiptune song by Aaron Cherof
    • Sniffer Egg, found from digging up suspicious sand in ocean ruins. Hatches into a baby Sniffer, grows twice as fast on moss
    • Sniffer, a new mob hatched from a Sniffer Egg. It can dig flower seeds up from most dirt blocks
    • Torchflower, a new 1-block-high flower, grown from Torchflower Seeds dug up by the Sniffer
    • Pitcher Plant, a new 2-block-high flower, grown from Pitcher Pods dug up by the Sniffer.
  • Smithing Templates, used to upgrade armor to Netherite tier or add decorative trims
    • Netherite Upgrade is now required to turn Diamond gear into Netherite gear. Found in chests in Bastion Remnants
    • Armor Trims add decorative trims to your armor. Most are found in chests in various structures, but one sometimes drops from Elder Guardians and a few are brushed up from suspicious sand and suspicious gravel. The trims can be colored using a different ingredient to provide the coloration.
    • They can be duplicated, which which requires 7 diamonds each, an existing template, and a specific block for each template

1.20.1

  • Language support for Serbian (Latin)

1.20.3: Bats and Pots

  • /tick command added, which allows you to adjust the tick rate of the game
  • Decorated Pot can now store up to a single stack of items, and interact with redstone accordingly
  • Bat model updated

1.20.5: Armored Paws

  • Armadillo mob. Rolls up if it detects a threat. Drops Armadilo Scutes when brushed. They're also bred with spider eyes.
  • Wolf Armor, crafted from Armadillo Scutes, grants extra durability to your tamed wolves, and can be dyed for tons of color variations. Can also be removed from a wolf using shears.
  • Wolf variants added, upping the total number of wolf varieties from 1 to 9, each spawning in different biomes. Wolves also have more health
  • Language support for Viossa


1.21: Tricky Trials

  • Ominous Bottle. Drops from killing a Pillager that has a raid captain banner equipped. Must be drank to provide the Bad Omen effect, instead of getting the effect automatically when killing the raid captain. Has five variations of increasing level.
  • New Potions and Potion Effects
    • Infested. If something with Infested is hurt, they have a 10% chance of spawning 1 to 2 silverfish nearby. Silverfish cannot have this effect. The potion is made by brewing an Awkward Potion with a Stone block.
    • Oozing. If something with Oozing dies, two slimes spawn. Slimes cannot have this effect. Brewed with an Awkward Potion and a Slime Block.
    • Weaving. If something with Weaving dies, 2 to 3 cobweb blocks spawn. Things with Weaving can ignore the movement speed debuff when moving through cobwebs. Brewed with an Awkward Potion and a Cobweb
    • Wind Charged. If something with Wind Charged dies, it generates a wind burst. Brewed with an Awkward Potion and a Breeze Rod
  • Trial Chambers: A new structure, containing many chambers that offer combat challenges that provide new loot as a reward
    • Regular mob spawning is disabled within trial chambers, so you won't have to worry about zombies spawning in addition to the challenges of the trial chambers
    • Trial Explorer Map. Point to a nearby Trial Chamber.
    • Trial Spawner, a new type of Monster Spawner that spawns mobs in waves, increasing in difficulty depending on how many players are nearby (the challenge goes up if you take it on with friends versus taking it on solo). Items are generated once all waves are completed, and loot pops out of it, some of it quite rare and desirable. Once the challenge is clear, it has a 30 minute cooldown before it can activate again.
    • Ominous Trial Spawner. If a player with Bad Omen gets within detection range of a Trial Spawner, the spawner becomes an Ominous Trial Spawner. Generates more difficult enemies (such as with armor or enchantments), sometimes themselves generate potions or projectiles (so now the blocks are attacking us), but also generates different loot.
    • Trial Key and Ominous Trial Key. Dropped as loot from Trial Spawners and Ominous Trial Spawners, respectively.
    • Vault and Ominous Vault. Unlocked by Trial Keys and Ominous Trial Keys respectively. Generate loot, usually incredibly rare and good loot. They can only be opened once per player. However, they only remember the last 128 players to open them. If a 129th player opens a vault, it forgets the player at the start of the list. Making all the loot from these completely renewable if you have 128 friends.
    • Breeze, a new mob that shoots wind bursts.
    • Wind Charge (entity), a new attack type. Generates a big puff of knockback that can send you into the air high enough to take fall damage or blow you off a ledge or into a hazard like lava or something. The burst can also activate redstone, such as buttons or trapdoors.
    • Breeze Rod, a new item dropped from Breezes
    • Wind Charge (item). Crafted from Breeze Rods and sometimes found in chests or Vault loot. It can be thrown to generate a wind burst where it lands. You can use it to gain height, and your fall damage will not count the height you gained from going up with the wind charge. Spammable, so you can scale sheer cliffs with this.
    • Heavy Core. A block, similar to a player head, that can be dropped as a reward from ominous vaults
    • Mace. A weapon, crafted from a breeze rod and a heavy core. It deals more damage the more the player falls before attacking, and cancels fall damage if the attack connects. There is no damage cap; fall from high enough, and you can one-shot the Warden.
    • Three new enchantments, all for the mace:
      • Breach, which reduces the effectiveness of armor on the target
      • Density, which increases the damage dealt per block fallen
      • Wind Burst, which generates a burst of wind when a falling attack from a mace hits. This launches the user upwards, allowing you to try for another falling attack. Each successive hit launches the attacker even higher. This enchantment can only be obtained from enchanted books in Ominous Vaults.
    • Three new pottery sherds
    • Two new banner patterns
    • Two new armor trim smithing templates
    • Three new music discs:
      • Precipice by Aaron Cherof, dropped as possible loot in Vaults
      • Creator by Lena Raine, dropped as rare loot in Ominous Vaults
      • Creator (Music Box) by Lena Raine, found rarely in decorated pots in the trial chambers
  • Copper has new uses: Chiseled Copper (decorative), Copper Grate (can be seen through and waterlogged), Copper Door (a door), Copper Trapdoor (a trapdoor), and Copper Bulb (a toggleable light source, rather than one that requires a constant power source to stay on). All have four levels of oxidation, each of which can be waxed to stay at those levels, for a total of 40 new uses for Copper. 
  • Tuff finally has more variants than just its default, all decorative: Chiseled Tuff, Polished Tuff, Tuff Bricks, Tuff Slab, Tuff Stairs, and Tuff Wall. Six more variations.
  • Crafter. An auto-crafter. Put in the ingredients into its grid, power it with redstone, and output the crafting result. Minecraft has officially entered the industrial age, the age of automation.
  • Bogged. A new mob. A skeleton variant that spawns in swamps and mangrove swamps, and as a possible enemy in Trial Chambers. Shoots poisonous arrows, as if the regular skeletons weren't bad enough. Fortunately they don't attack quite as often.
  • Witches now always drop 4 to 8 redstone dust on death, making witch farms more effective at obtaining redstone
  • Leads can now attach to boats, which allows for hilarious setups of multiple players in boats holding other players in boats and so on (but also lets it look like the boat is properly moored to the dock if your base allows for it)

1.21.1

  • Language support for Tzotzil and Belarusian (Latin)

1.21.2: Bundles of Bravery

  • Bundles are finally added! Crafted with string and leather and can be dyed. Can store a sum total of one stack of items, even if those items are different. This can help clean up the mess of things you have in your inventory that you only have like two or three of, like random seeds, flowers, saplings, or whatever. Go on a big exploration and only bring back a couple of one type of item so you can start a farm for it? Bundle. With this, everything promised for version 1.17 has finally been added.
  • Baby variants of dolphins, squids, and glow squids
  • Language support for High Norwegian
  • Two old banner patterns were made into proper banner pattern items
  • Nether portal teleport cooldown massively reduced for minecarts, boats, and projectiles. I'm sure there's plenty of technical uses
  • Slime Blocks cancel fall damage as usual, but they used to not do that if you were crouching when you landed on them. Now they do.
  • Equipping a carved pumpkin now removes your player marker from other players' maps, allowing you to hide from them in those situations
  • All types of fish as well as rabbit stew can now be used to heal or breed wolves
  • Bulk crafting can now be streamlined! Press space or enter to reload the previous crafting recipe used. Dispensers are going to be much less tedious to make now!

1.21.4: The Garden Awakens

  • Pale Garden biome, generates on mountains. It has no background music and cancels any ambient music that was already playing if you walk into the biome.
  • Pale Oak Tree, grown with four pale oak saplings. A white wood type. We can finally have our classic picket fence!
  • Pale Moss, generates on the ground and spreads to nearby 'dirt' or Stone when Bone Meal is used on it.
  • Pale Moss Carpet, also generates on the ground and spawns in Pale Gardens when Bone Meal is used on the ground. It also grows mossy vine-like textures up the sides of blocks it is placed next to, which can be up to two blocks tall.
  • Eyeblossom. A new flower that is closed during the day and opens to show a glowing orange core at night. Both are counted separately and can be crafted into different dyes (gray for closed and orange for open). Generated by using bone meal on an existing eyeblossom or on grass in the pale garden.
  • Creaking Heart. Generates in naturally-spawning Pale Oak trees, generally hidden. They're 'active' if there's a Pale Oak Log on the top and bottom of it. They also take an unusually long time to break...
  • Creaking. New mob. Spawns at night within a certain radius of a Creaking Heart. They only move when you're not looking at them. They cannot take damage, at all. They can only be destroyed by breaking the Creaking Heart they're connected to.
  • Resin Clump. Generates on blocks very close to the Creaking Heart when the Creaking is hit.
  • Block of Resin, a new decorative block formed with 9 resin clumps. Using two Pale Oak Logs and one Block of Resin, you can craft your own Creaking Heart... Or two... Or twenty...
  • Resin Brick, formed by smelting a Resin Clump. Can be used as an armor trim ingredient.
  • Resin Bricks, a new block formed by crafting Resin Brick. It has chiseled, slab, stair, and wall variants as well.
  • Language support for Popoloca

1.21.5: Spring to Life

  • Leaf Litter added in some forest biomes. Dead leaves to decorate the world. Fun little touch!
  • Wildflowers, a new flower type that generates in a few biomes.
    • Both Leaf Litter and Wildflower have the same placement rules as Pink Petals
  • Bushes, Short Dry Grass, and Tall Dry Grass generate in a number of biomes as new decorative plants
  • Firefly Bushes generate in swamps and near rivers. They generate glowing firefly particles around the bush when it's dark.
  • Cactus Flower. A new type of flower that grows on top of cacti.
  • Chickens, Cows, and Pigs now have three variations each
  • Fallen trees can generate in some biomes
  • Language support for Kyrgyz
  • Ender pearls now load chunks. I don't think I can explain how game-changing this is. Getting a setup where an Ender Pearl just floats there will leave the chunk loaded for as long as it's there, and it won't despawn until it hits something. You can have certain item and block farms running full time without having to be physically present to load them. You might need a lot of ender pearls, but still.
  • Lodestone is now much cheaper to craft, requiring an Iron Ingot instead of a Netherite Ingot. Thus it is now a renewable block.
  • All spawn eggs now have different textures to make it clear which mobs are spawned by which eggs. Previously, some eggs had very similar colorations, making it hard to discern, say, a Slime spawn egg from a Creeper spawn egg.
  • Cartographer villagers have had their trades changed. They now sell several maps that indicate villages, jungle temples, and witch huts, as well as the Trial Explorer Map.
  • Wandering Trader now has better prices, more trades, and more stock. They can also buy things from the player.
  • Zombified Piglins must now be killed by a player to drop player-specific loot. This means using Zombified Piglin farms that rely on entity cramming will no longer result in them dropping golden swords. Which can simplify gold farms, but it was slightly annoying for me since I had figured out a way to account for that.

1.21.6: Chase the Skies

  • Music Disc: "Tears" by Amos Roddy. Dropped when killing a ghast with a fireball deflected by a player.
  • Dried Ghast. Found around fossils in Soul Sand Valleys, obtained through bartering, or can be crafted. Placing them in water will slowly hydrate them over 20 minutes.
  • Ghastling. New mob: a smaller, non-hostile version of a Ghast.
  • Happy Ghast. New mob: a full-sized, non-hostile Ghast. Standing on it causes it to stop moving, and it acts like a solid platform in this situation.
  • Harness. This can be placed on a Happy Ghast to allow it to be controlled, letting the player ride it and fly around with it. Up to four players can ride a Happy Ghast. It also takes damage from fire and lava but heals from water.
  • Locator Bar. A UI element that shows where players are. Wearing a Carved Pumpkin or a mob head will hide you on the locator bar.
  • Leads (or leashes, if you prefer) now use five string in their crafting recipe instead of four string and a slimeball. They can also allow you to leash two mobs together. Leashed mobs can now be un-leashed using shears. Using a firework rocket when flying with leashed entities now breaks the leash.
  • Saddles can now be crafted, using three leather and one iron ingot. They can also be removed from mobs using shears.

1.21.7

  • New painting of a Minecraft wolf
  • Music Disc: "Lava Chicken" by Hyper Potions, obtained by killing a baby zombie while it is riding a chicken (a.k.a. a Chicken Jockey).
  • Yes, this is a reference to the movie.

1.21.9: The Copper Age

  • Set to be released tomorrow, barring unforeseen delays.
  • Copper armor and tools: sword, axe, pickaxe, shovel, hoe, helmet, chestplate, leggings, boots, and horse armor
  • Copper nugget. You get nine if you craft a single copper ingot or by smelting any of the copper gear listed above
  • Copper torch, identical to the torch but with a green particle instead of a yellow one. Doesn't change the color of the actual lighting it generates.
  • Copper chains, lanterns, and bars, each with four oxidation levels and the ability to be waxed, for 24 more things
  • Lightning Rods now have four oxidation levels and can be waxed, for 7 more things.
  • Copper Golem and Copper Chest, both generating by placing a carved pumpkin or jack o'lantern on top of a copper block.
    • Copper Golems will take things from a nearby copper chest and try to put them in a regular chest. They can also oxidize over time and can be waxed.
    • Copper Golem Statue. A fully-oxidized Copper Golem will become a Copper Golem Statue block that can be mined, picked up, placed, posed, cleaned, and waxed. If it has been cleaned of all oxidation and an axe is used on it, it will reactivate as a Copper Golem.
    • Copper Chests can also be crafted on their own using a chest and copper ingots.
  • Shelf: a new decorative block that allows you to store up to 3 stacks of item, displaying the items. Interacting with a shelf will swap items between the shelf and your inventory, three stacks at a time.
  • Mannequin: a new technical entity only generated by commands. It is a player avatar without a connected player. It allows you to pose it and give it equipment. Good for mapmakers to make towns feel more full.
    • /fetchprofile command lets you have a player profile that you can use to spawn the relevant player head or summon the relevant player mannequin
  • Language support for Halychian
  • Dyes now have updated textures to make them more distinct. Good for colorblind players.

Share this post


Link to post
Share on other sites

Not too much to talk about. I've mostly been sticking to familiar weapons in Splatoon and trying to level up my gear.

Minecraft, I decided to hop back into and built a little playroom for my Minecraft cats. No plan going forward; just build a cat house.

I later decided to build a Resin farm. Punching the Creaking causes resin to appear on blocks next to the Creaking Heart they're tied to, and using the right mechanism to automatically move those blocks, you can make them drop, thus allowing more resin to form on them. Automatic farms are all the rage in Minecraft. I did build it at the tippy-top of the world height, which was tricky to actually get to when I realized I didn't have enough resources and had to go back down and back up again and back down and back up...

After this I decided to tackle the Trial Chambers. I dug my way down to one and set up a little base of operations. Then I went through and immediately noticed that the very first Trial Spawners I ran into spawned the Bogged. You know, skeleton archers that shoot poison arrows. And there were three of these things right next to each other, constantly spawning wave after wave of them. I was able to clear them and block them off, and did so with every other Trial Spawner I ran into in there. Got a bunch of loot. I kept hoping to get an Ominous Bottle, and really I ended up hanging around the spawners more than I probably should've in order to farm loot. Once things were properly blocked off, all the spawners didn't really give me any challenge...except for the Breeze spawners, since those things are annoyingly mobile, immune to arrows, and use attacks with heavy knockback pushing me out of melee range. Still, I did eventually manage to get Ominous Bottles, switching the spawners to Ominous Trial Spawners, and got enough Ominous Trial Keys to get all the good loot.

One thing that the updates did at some point is break my experience farms. I mentioned that the changes to Zombified Piglin loot tables means that my gold farm that uses entity cramming no longer drops golden swords. It also doesn't drop experience, meaning I can't just stand there and get a buhmillion experience points. But at some point, another tweak was done that renders my other experience farm useless for that purpose. My Enderman farm doesn't work anymore. They die on impact with the ground, sure. But they don't drop experience if they don't die to a player's actions, meaning I can't get experience from that. I have to raise the platform up by one block in order to get it to work. One Block. It's a lot harder than it sounds because there's redstone mechanisms to remove the platform so Endermen don't accumulate there and lag everything with too many entities.

So I have work to do.


Oh, there's the snapshots for the next big update. Presumably 1.21.11 because 1.21.10 came and went and just fixed up some bugs in the code.

Anyway:

  • Spear. A new weapon, with variants at every material type. It functions more like a lance, where holding the attack button and moving around with it deals damage to anything you pass, though you can also just tap the attack button to hit people with it. It has more reach than a sword and deals more damage the faster you're going, which makes it great for fighting on horseback or divebombing someone while flying with an elytra...provided you don't miss, of course.
    • Lunge, a new enchantment for the Spear. Using melee attacks causes it to move you lunge forwards, which works like a dash attack of sorts.
  • Zombie Horse. This mob has existed in the game's code forever, but it's now finally available in survival.
    • Zombie Horsemen. Zombies can spawn riding Zombie Horses. And hold spears. While riding Zombie Horses. The undead hordes now have a proper cavalry. Oh god.
  • Nautilus. A new mob that lives underwater. They can be tamed and bred using pufferfish. If tamed, you can put a saddle on them and ride them around. While doing so, you cannot drown. This is great for building underwater since it makes underwater movement so much easier. They also have a dash movement option.
    • Breath of the Nautilus. A new effect that stops your oxygen meter from depleting. Only applies while riding a Nautilus.
    • Zombie Nautilus. There is a 50% chance that a naturally-spawned Drowned that wields a Trident will be riding a zombified version of a Nautilus. As if trident-wielding Drowned weren't bad enough. Zombie Nautilus function the same as regular ones, except they burn in sunlight if removed from the water and can't be bred to make more.
    • Nautilus Armor. Armor for your Nautilus to help them survive longer. Comes in every armor material type.
  • /stopwatch. This command creates an in-game stopwatch. Could be useful for commands, like if you're building a sports area or some timed minigame or something.

Alright, so I need to boot my world in the new snapshot to get a librarian villager to trade the Lunge enchantment. This is always a concern since there's an update to villager trades on the horizon and I want to lock in all the trades I can before then.

Share this post


Link to post
Share on other sites

Which would be the best friend? Zombie, Skeleton, or Ghost?


So instead of forcing myself to get good with a roller, brush, or charger, I decided to just stick with what I already knew. I picked up one of the other kits for the Splatana Wiper and Undercover Brella to just have fun. That's the whole point of video games: fun. Not forcing yourself out of your comfort zone to fill a quota or something.

The Splatana Wiper Deco is the second kit for the Splatana Wiper. As a reminder, it's a sword that fires a 'beam' of ink in front of it and also does melee damage, plus it has a charged attack that both deals more damage with the ranged attack and ups the melee to a one-hit kill if it hits; the charge attack also can lunge forwards slightly to suddenly get in close, but the distance isn't that great.

The Deco kit has the Squid Beakon as its sub weapon. I've mentioned super jumping before, where you can suddenly jump to an ally. The Squid Beakon is a placeable jump point. It has two uses before it pops, though anyone who has a Beakon as their sub weapon breaks it instantly regardless of how many jumps it has left. In addition, the Beakon only breaks when the second jump actually lands on it; if more people jump to it before it breaks, you could theoretically get five uses out of one Beakon. Another drawback to Beakons is they're visible to everyone on the map, even the enemy team. Beakons are great for getting people back into the match quickly; since other players are likely to be in the fray, jumping to them is a risk since you might land and instantly get splatted. Beakons are ideally placed in protected areas around corners or behind cover, spots that are hard to hit unless the enemy is making a very strong push into your turf, at which point just spawn normally. A fun thing to do is to zip behind enemy lines and put Beakons in their turf, so you can get allies behind the enemy to flank them.

The special is the Tenta Missiles. This special creates a big targeting circle that highlights opponents inside of it. Activating the special while enemies are highlighted will fire off a ton of missiles at them. If only one player is targeted, they get all ten missiles. If two players are highlighted, they get five each. If three or more are targeted, they get four each. This is great to use if you're in the back inking the base while the rest of the team moves up, so you can spam missiles at them from complete safety. In the fray, it might work as a panic button, but it does take a few frames for the first missile to actually fire so you could theoretically get splatted first.

All things considered, the Splatana Wiper is kind of a front-line weapon, being fast and having a fairly good fire rate, working as team support with the Beakons, while having the missiles in the back pocket for later. It's overall pretty fun.


I mentioned sticking with the vanilla Undercover Brella before switching to the Patternz Undercover Brella. Well, I've picked up the vanilla again. As a reminder, Brellas fire shotgun blasts. Normally holding the fire button fires one shot and then opens the umbrella canopy to act as a shield, then holding it further detaches the canopy so it moves forwards as mobile cover. Brellas are normally tap-fire weapons. The Undercover Brella breaks the rules by not detaching the canopy and being a hold-fire weapon, letting you shoot continuously with a shield. The trade-off is the canopy has the least health of all Brella shields and the shots do the least damage.

The vanilla kit's sub weapon is Ink Mine. I've talked about this before. Placing a land mine that doesn't instant kill but deals okay damage and places a tracker on nearby opponents, usually the one that triggered it. It's great for information, since you'd want to place this in chokepoints or common walkways so you know if opponents are approaching from that direction. If you're near the mine when the enemy triggers it, that means they might've taken damage but there's also now a big ink splatter near them, limiting their movement options, making it easier to hit them.

The special is the Reefslider. This one has you hop on a big shark-shaped pool toy that moves forwards some distance before exploding, taking out anyone nearby. You can also explode it early. It can be used for surprising people with an instant-kill explosion, forcing them to either take it and respawn or run the heck away, scattering their formations. The Reefslider also insta-kills if it runs someone over on its way to exploding. Using the Reefslider also inks the path forward that it will take, which could help to trap opponents and obstruct movement. It's also great for running away; that rapid movement into their formation can just as easily be used as an escape pod. You also have a few invincibility frames after the explosion. The trade-off is that you're largely a sitting duck for a few frames after the explosion, so keep in mind where the surviving enemies are if you charged in. Plus, much like with Crab, you are sitting on the back of the thing completely exposed, so if they're good at aiming, they could just shut you down completely.

I think this is the most 'spy gadget' of all the Undercovers. The classic umbrella gun, the land mine, and the tricked-out car. A strong special to go with a low-power main weapon and support-focused sub weapon.


I've had some recent fun with both of these. One thing I haven't mentioned is that Splatoon weapons have weight classes. Lightweight, Midweight, Heavyweight, and Super Heavyweight (which is exclusive to the Rainmaker). Heavy and Super Heavy weapons slow down your movement speed, while Lightweight weapons unsurprisingly increase your moment speed. Lightweight weapons tend to be weaker, so the mobility buffs help with their survivability, letting them dodge easier. Heavyweight weapons meanwhile are very powerful and have slower movement as a drawback.

Of all my picks, the Tri-Slosher, Undercover Brella, N-ZAP, and Splatana Wiper are all lightweight weapons, and I've used a few other lightweight weapons I haven't mentioned yet. Part of what makes them fun is being able to get in quickly and bother opponents, set up support things like Beakons or Ink Mines, or just sneak into enemy turf before they can stop me and cover their base. I might just use more lightweight weapons.

Share this post


Link to post
Share on other sites

Which would be the best friend? Zombie, Skeleton, or Ghost? The results are in, and the winner is... Team Zombie! Way to go, zombies! No matter how often you went down, you kept getting back up. I was on Team Ghost, though, and we got second place. I thought we were a boo-in to come out on top, but here we are... Mostly because I didn't even see Team Zombie in a match except for like three times, literally. Most of the matches were mirror matches or Team Skeleton.


Minecraft.

So. I managed to successfully clear out an Ocean Monument. Drained it entirely of water, inside and out. Now there are no spots for Guardians to spawn.

Now I just need to build a spot for Guardians to spawn. And funnel them into a kill chamber, of course.

I'm not sure if I should completely delete the monument and just leave the blank floor to work with, empty the interior but leave the exterior, or leave the structure as-is. I am thinking about deleting the water further out from the monument's borders, though.


They've added two new mobs: the Camel Husk, and the Parched.

The Camel Husk is a desert zombie version of a camel. When they spawn, a Husk (desert zombie) wielding a spear sits on top of it, as well as a Parched.

The Parched is a desert Skeleton. They don't burn in sunlight, just like the Husk, and they shoot arrows that inflict the weakness effect on whatever it hits. Sounds like fun, huh?

Share this post


Link to post
Share on other sites

I've mostly been massing around in Minecraft lately, largely exploring new places to get some loot.

Version 1.18 changed how the game generates terrain, which makes for some interesting changes in terrain generation when you go from old terrain generated pre-1.18 to new terrain.

One of the changes in my world is around my Mushroom Fields biome. Before I updated the world to a post-1.18 version, I used a program on some browser to check the terrain generation and find specific biomes, one of which is a Mushroom Fields biome. The fun benefits of that biome is that hostile mobs don't generate there (except Phantoms, but if you sleep, that isn't a problem), making it great for setting up passive farms or having builds that can play with darker light levels without worry of accidentally creating a hostile mob spawning hotspot in the middle of your build. So I wanted to keep one. So I opened up a Nether portal and hopped through into the biome.

After updating the world, however, it turns out that the new terrain generation would've put a Wooded Badlands biome in that spot (basically a mesa full of red sand, terracotta, and coarse dirt), so now my Mushroom Fields biome is surrounded on all sides by the American Southwest basically.

But in the newly lowered bottom of the world terrain, the cave biome there is the Deep Dark. Which also doesn't generate mobs. A Mushroom Fields biome directly above a Deep Dark means that basically nothing spawns except Phantoms and the Mushroom Fields' local passive mob that can be ignored.

But the Deep Dark can also generate the Ancient City. Home of the Warden.

And, as of the 1.20 update, home of some unique loot: a pair of cosmetic armor trims.

I want to collect all of the armor trims, so I went looking for more Ancient Cities than the one I looted in the previous thread since, after all, I'd already looted that one and thus it didn't have the new armor trims. In a copy of my world, I not only found one, but two Ancient Cities generating so close to each other that they were actively overlapping. Really impressive! And a short distance away (if you can count a kilometer a 'short distance') was a third one! (In my main world, I got one of the armor trims from the third and ignored the double city entirely).

But then on a whim I decided to go to my Mushroom Fields biome in that copy of the world, and I found the Deep Dark underneath and THREE ANCIENT CITIES not too far away from each other. One of which had surface access! Just on the edge of the shift from old terrain to new terrain was a surface opening to a rather massive and impressive cave that would let me fly directly to the city.

Hardest structure in the game, forcing you to play stealth rather than combat.

Whoosh. Grab. Whoosh. Done.

Okay, I did kinda play stealth since the Sculk Shriekers that summon the Warden give you the Blindness effect for a brief moment, which is a bad thing when you're flying in any situation but especially when you're underground and need to land in a specific location and the cave also has lava in it.

But still. Whoosh!

Share this post


Link to post
Share on other sites

Create an account or sign in to comment

You need to be a member in order to leave a comment

Create an account

Sign up for a new account in our community. It's easy!

Register a new account

Sign in

Already have an account? Sign in here.

Sign In Now